
a seated firing position
Introduction
Marksmanship describes a person’s ability to shoot a firearm accurately. This guide is linked to others in the Firearms series, and aims to describe the following:
Basic marksmanship principles;
Limitations of environmental factors, such as weather;
Personal limitations which change depending on physical exertion and environmental conditions.
Marksmanship principles
- The shooting position and hold must be firm enough to support the rifle.
- The rifle must point naturally at the target without any undue physical effort.
- Sight alignment and sight picture must be correct.
- The shot must be released and followed through without undue disturbance to the position.
- In the seconds before taking the shot, the final procedure should always be the same, following the routine in the table below; stable shooting position, good sight picture, controlled breathing, controlled trigger pressure, follow through.
| Ready | Aim | Fire | Follow through | Be aware | |
|---|---|---|---|---|---|
| Body position | As comfortable as practicable; allowing for an unforced point of aim; firm but not tense muscles, butt well into shoulder. Grasp the small of the stock with the trigger hand and pull the rifle back into the shoulder. If used, the supporting hand should not touch the barrel or moderator (only the fore-end). Ensure that the barrel or moderator are not in contact with anything. | Final fine adjustments using knee if prone to adjust elevation, allowing for movement due to breathing. | Steady, stable, firm. | Absorb recoil, continue steady hold. After bullet has struck, chamber another round. | Avoid flinching by not anticipating the recoil. |
| Sight (see diagrams) | Clear picture that fills the eyepiece, no crescent shading, target clearly visible. | Slight reticule movement up/down target while breathing, focus back and forth at target and reticule. | Crosshair comes to rest precisely on target, focus is on the reticule at instant of fire. | Continue to focus on target looking for bullet strike, observe reaction to shot. | Keep the sight firmly on the target and follow through (that is, watch the bullet hit). |
| Breathing | Normal cycle. | Deeper inhale, then exhale. | Hold. | Back to normal. | After exertion, pause before shooting to control breathing. |
| Trigger control (Squeeze) | Safety off, tip of finger resting lightly on flat of trigger. | Apply light pressure in readiness for final squeeze. | Straight squeeze exerting no sideways pressure. | Leave finger lightly touching trigger. | Squeeze, rather than pull the trigger. |
Sighting
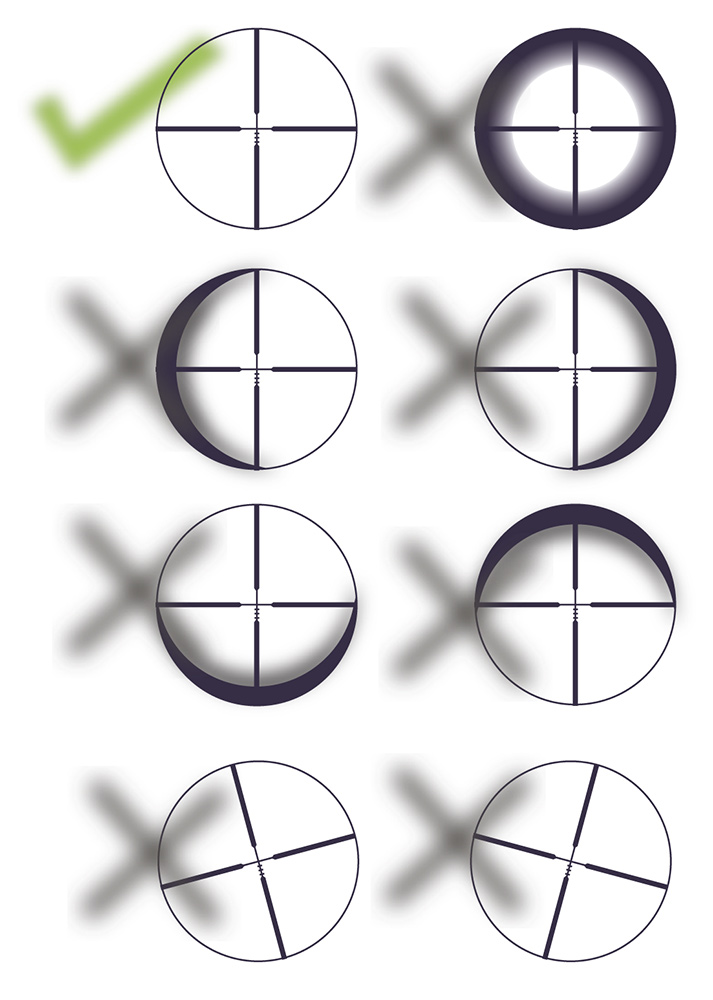
Top left is the only correct ‘scope picture. With cheek resting on the butt, move your head back and forward until the correct picture is seen. This usually occurs at a distance of 4-5 inches between the scope and your eye
Avoid canting and be especially aware of this when using bipods
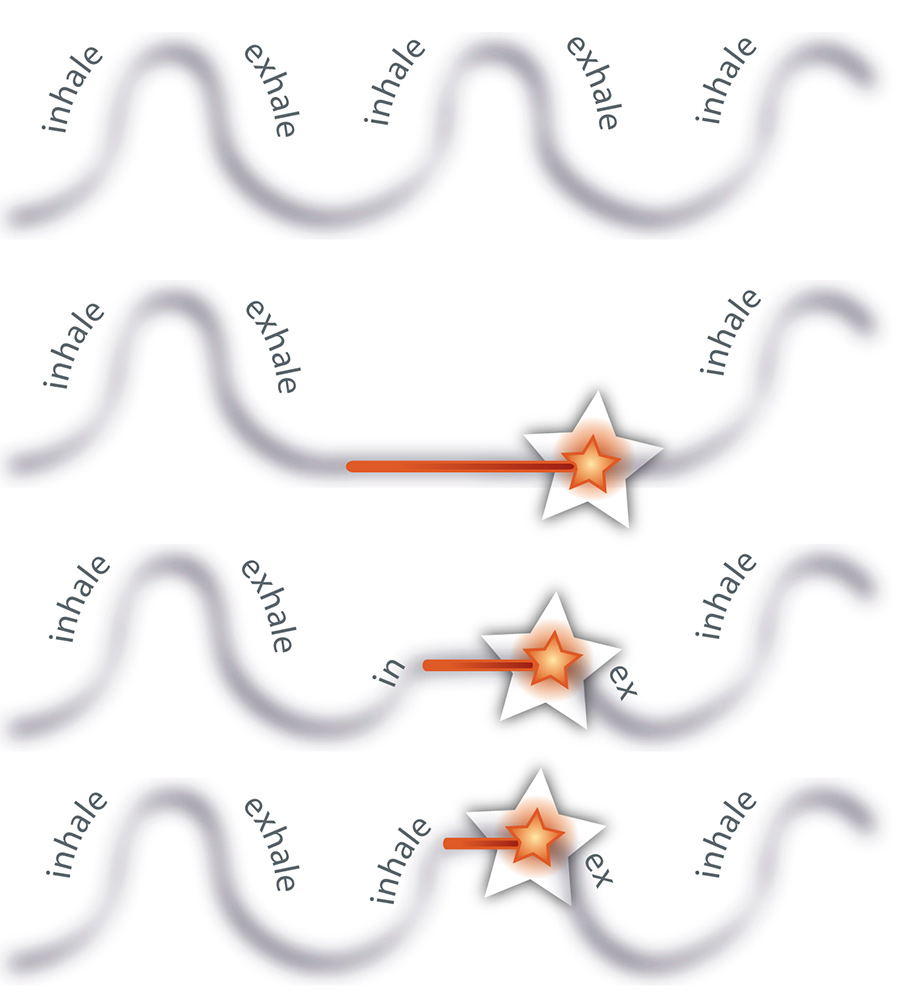
(top) normal breathing cycle (next) empty lung technique with red bar denoting holding the breath and fire on completion; (third) is the half-full lung technique with slight inhale and shorter hold of breath; (bottom) is the three-quarter full lung technique with a short holding of breath
Breathing: As you breathe, the cross hairs will move up and down the target . It is best to arrange the shooting position so that the cross hairs come to rest at the desired point of aim when the lungs are empty. This is because we tend to breathe out to the same level on each breath and the diaphragm is more relaxed. There is also a natural respiratory pause that occurs when the lungs are empty so it is easier to hold the breath. Under certain conditions, you may not have enough time to complete the breathing cycle and should therefore practice the half and three quarter full lung technique
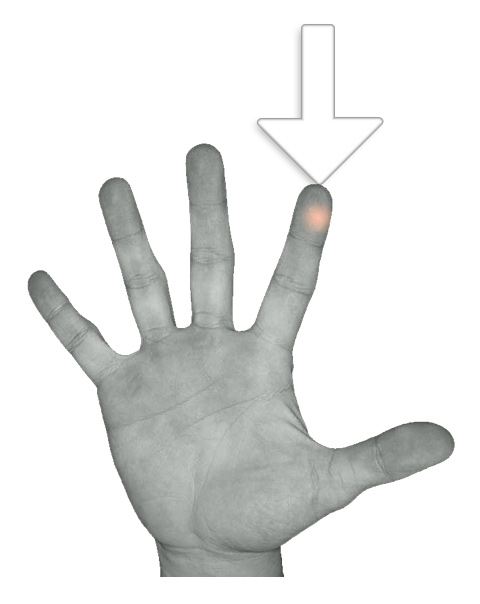
Use the most sensitive part of your finger. Trigger pressure. Squeeze the trigger and remember to follow through.
Factors affecting marksmanship
Shooting is easiest when the shooter is calm and concentrating, in good light, low wind and with a clear target at a known range. These conditions are possible to replicate on a range but in the field are unlikely to occur at all times. The shooter needs to be aware of the effect of changing circumstances on marksmanship and to learn to deal with them.
- Know your ability to group shots in different circumstances, in particular when shooting after exertion, from different positions and at different ranges.
- Only take shots that are within your capability.
- Know at what distance your rifle is zeroed, and where your shots will fall at other distances.
- Estimate the range as accurately as possible, a range-finder may help. See also the Zeroing guide.
- Poor light, mist or snow all make accurate shooting more difficult; take account of the effect of cross-wind on your bullet.
- Ensure that nothing will impede the bullet on its flight path. The view through the telescopic sight may be clear, but because the muzzle is beneath the line of sight, the path of the bullet may be obstructed by an unseen object such as vegetation or a rock. Similarly an obstruction may not be clearly in focus in the scope, checking with binoculars can help.
[printfriendly]